OpenWRT and the Zsun Card Reader

During the last few weeks since my first post about the Zsun WiFi Card Reader I learned a few things that I haven’t documented yet.

After I was able to confirm that my device has indeed PCB v2 but that flashing should work just the same, I tried the simple method described here:

  1. Insert a FAT formatted micro SD card into the reader and plug the reader into a PC (running Windows, in my case). The card should be assigned a drive letter, say “J:”.
  2. Connect to the WiFi access point created by the reader.
  3. Open http://10.168.168.1:8080/goform/Setcardworkmode?workmode=0
  4. Open the drive/card in the file explorer, create a new folder named “.update.” and copy the SD100-openwrt.tar.gz archive into it.
  5. Open http://10.168.168.1:8080/goform/upFirmWare – this should return status code “2”.
  6. Wait patiently for the described LED flashes!
  7. Connect to the new access point called “OpenWRT”.
  8. Open https://192.168.1.1/cgi-bin/luci and configure OpenWRT.

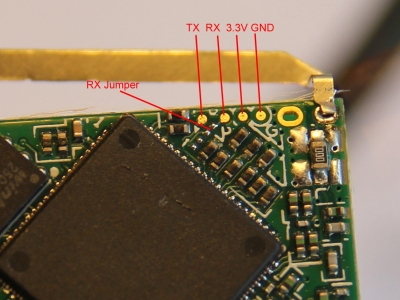
This worked like a charm (a big thanks to Warsaw!), but only 5 minutes later I managed to lock myself out with a bad WiFi config. Great. So I went ahead and soldered leads to the serial headers. But while I was able to receive and read the console output just fine I had no success sending any input to that console. Only today I learned that PCB version 2 is missing a jumper that needs to be connected in order to enable serial RX. Connecting this jumper has exceeded my meager soldering skills so far, though.

Fortunately, I learned another fact from a helpful comment on my previous post: By inserting or removing the SD card during boot, OpenWRT can be put into fail-safe mode that will reset the configuration. I kept inserting and removing it in quick succession for about 10 seconds in order to get the timing right. Now I’m able to connect to the WiFi again!

Update:
One of the images is showing an Ethernet cable attached directly to the board. This did not work for me and trying it was somewhat naive. It’s been brought to my attention that this might damage the SoC, too. If resetting an OpenWRT installation as described above is not enough, the best way to un-brick the device seems to be through the serial console as described in the comments.

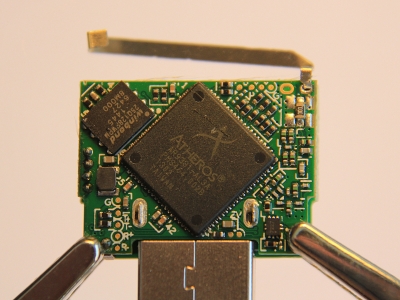
 

The Zsun WiFi Card Reader

I’m not sure where I read first about the $8 Zsun WiFi Card Reader and the attempts by the people at Warsaw Hackerspace to flash it with their port of OpenWRT. It made me curious, so I went ahead and ordered a sample. Shipping from China took a while but I received the tiny gadget yesterday.

So far I could confirm the documented root access to the stock firmware via telnet on port 11880 using the password “zsun1188”. I have not tried flashing OpenWRT yet as I am not sure which of the at least two different PCB versions I got. Could anyone give me a hint on this?

OpenWRT and Scripting Languages, Part 1

The RGB wall light project is currently on hold due to a massive lack of time. Still, I’m taking little steps of preparation for the second phase of the project, the software intended to control the RGB matrix. I could use the gcc cross compiler for the job, but using a scripting language to develop directly on the device promises to be far more comfortable. I’d like to narrow this down to languages readily available as packages for OpenWRT which leaves me with Erlang, Lua, Ruby, Perl, and Python. Since I feel like trying something new I’m going to rule out Perl for now.

Make Room

The installation of the bleeding edge OpenWRT version called “Attitude Adjustment” on the TL-MR3220 leaves about 1MB of space for additional packages to be installed – which isn’t even close to being enough for this purpose. So, the first step is to extend that space and the currently recommended way to do this is to move the overlay mount to an external USB device: Continue reading

Wifi Enabled RGB Matrix Wall Light, Part 1

Inspired by the so called Lampduino and several other related projects I decided to build my own version of a RGB matrix wall light some time ago. During the last few weeks I finally managed to start out on this project.

Hardware

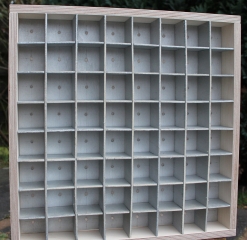
The matrix of 64 individual cells and the LED back-plane are made from 4mm thin plywood that I spray-painted with a silvery varnish. The outer frame is made from a stronger 14mm birch multiplex board, yielding a very solid construction. I also bought some thin, white PVC board intended as the material for the front cover, but I still have to figure out how to cut that nicely.

Lacking the ambition to create my own LED driver board I settled for the “Rainbowduino”, an Arduino compatible board developed and sold by Seeed Studio. In addition to that, I wanted the matrix to be controlled and programmed over the air. One of the cheapest, easiest, and most versatile ways to accomplish this was to modify an OpenWRT based router for this purpose.

Continue reading

Serial Communication Between an Arduino and the TL-MR3220 Router

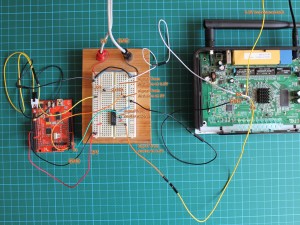
Last time, I installed OpenWRT on the TL-MR3220 router and added a connector for it’s serial interface. Today, I wanted to try and connect this interface to an Arduino to make the two communicate. The router’s interface operates at 3.3V while the Arduino’s UART operates at 5V, so we need to convert between those levels. The cheapest way to do this that I could find is described here. It involves using a 74LS04 hex inverter chip to convert the 3.3V signal up to 5V and two resistors for a simple voltage divider to convert the 5V signal down to 3.3V.

Continue reading

OpenWRT and the Serial Console of the TL-MR3220 Router

The TP-LINK router TL-MR3220 is a very cheap (around €22 in Germany) yet feature-rich wireless 802.11n router that supports the open source OpenWRT firmware. It offers a USB port, allowing a bunch of additional peripheral hardware to be connected. Installing the matching OpenWRT nightly build was easy enough, the original firmware offers to do so using the standard web interface.

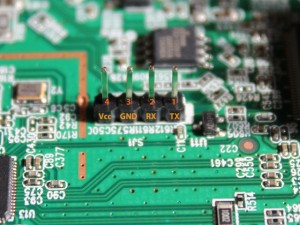
I was thinking about connecting one of them to an Arduino in a project to come. The integrated serial interface seems to be the obvious way to achieve this. The router’s board readily exposes the interface, so I added a 4-pin header to do a few tests. The pin-out of the interface is documented in the OpenWRT wiki. Using a standard FTDI adapter I then got access to the router’s serial console. From here it should not be to hard to use the same interface to connect to an Arduino instead.