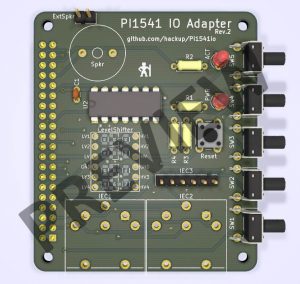
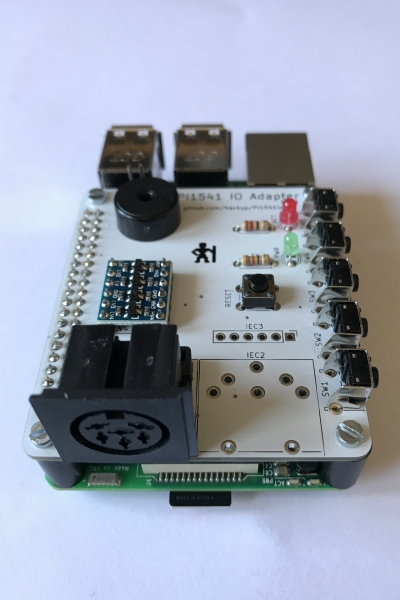
The prototype batch of PCBs for revision 4 of the Pi1541io board didn’t take long to ship and it arrived from PCBWay while I was on vacation. Today, I finally managed to assemble one of the boards and everything seems to work great!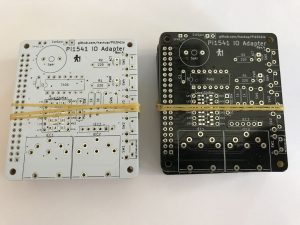 Revision 4 is basically what the previous one should have been: an improved rev.2 with an added I2C connector for an OLED display. In this revision though, the I2C connector can be configured to accommodate different kinds of display modules.
Category Archives: Uncategorized
Pi1541io in between Revisions
After I assembled and tested the first revision Pi1541io board, I sent the remainder of the prototype batch on to interested members of Forum64 for further testing.
While I’m still hoping for feedback from their side, I’m already working on the next revision of the PCB that will fix a couple of minor issues. As hinted earlier, my intention was to also add optional support for a TXS0108 based level converter. So I acquired one of those modules, tried it on my Pi1541, and couldn’t get it to work at all. It turns out that the TXS0108 is too slow for this job as it seems.
Meanwhile, Steve White has updated his site again, providing an additional wiring diagram. This alternative circuit features an additional 7406 inverter IC that is used for driving the output signals from the Raspberry Pi to the serial bus. Using this solution, multiple devices on the bus should no longer be a problem.
So, I ditched the TXS0108 and I am working to support Steve’s 7406 based solution in revision 2 of the Pi1541io. This support will be optional, i.e. you will still be able to use the board with just the level shifter. Speaking of the level shifter: also in revision 2, you may now chose between using a ready made module like in revision 1 or using discrete components instead.
Also, I am still preparing the project repository for upload to Github. Should happen soon now, stay tuned.
Pi1541 IO Adapter
Update 2018-05-25: Now that revision 1 is confirmed to be working despite a couple of minor issues, here’s the rev.1 Gerber files for download. Bear in mind though that the improved 2nd revision is under development and will be available soon!
Two weeks ago, there were exciting retro-news on the Lemon64 board: Gorack – aka. Steve White – released the first version of his Pi1541 that he had been working on for quite some time. “Pi1541 is a real-time, cycle exact, Commodore 1541 disk drive emulator that can run on a Raspberry Pi 3B (or 3B+).”
I was curious and wanted to give this a try, but I also wanted proper wiring. So I created my own version of an extension board for the Raspberry Pi. (Not a proper “HAT”, that would require an eeprom and other things.) I then ordered a small prototype batch because others were eager to try our new retro toy, too.
I received the PCBs on Friday after some unfortunate delay at the German customs and by now the first board is assembled and seems to be working fine!
There are two minor issues in revision 1 that I will address in revision 2: Continue reading
Cheap USBASP Sticks for V-USB Development
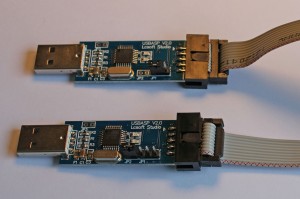
A while ago I ordered a couple of cheap USBASP sticks. They are to be had on Ebay for as little as 2,50 € including world wide shipping and meant to be used for programming AVR microcontrollers. The programmer itself is based on an ATMega 8 controller so one of the sticks can actually be used to update the USBASP firmware on the other one. All it needs is shortening JP2 on the board to be flashed.
avrdude -v -c usbasp -p atmega8 -U flash:w:usbasp.atmega8.2011-05-28.hex
But that is not even best part: the USBASP firmware is based on the open source V-USB driver, meaning these sticks can easily flashed with any other firmware using the same driver. So, they make for a cheap, complete, and easy to handle development platform for USB projects like the IR receiver introduced in an earlier post.
USB Receiver for the Ruwido Merlin IR Keyboard
When I noticed this compact IR Keyboard was on sale for no more than 1.- € I had no choice but to order a couple. One of them might prove useful when I manage to set up a media center based on a Raspberry Pi some day.
Of course, this keyboard comes without a receiver. But how hard could it be to get it to work with LIRC? Very hard, as it turns out. Fortunately, I wasn’t the first one to encounter this problem. There is an open source decoder for this keyboard targeting AVR microcontrollers and I had just come up with the idea to combine it with the V-USB stack to create a USB receiver when I found out that someone else had already done just that.
The circuit was easily set up on a breadboard, but the firmware needed a few minor modifications to compile with recent versions of avr-gcc. When those were done and the firmware flashed, the operating system would still refuse to accept the circuit as a valid HID device. It took me quite a while to figure out that the author had made and committed some changes that seemingly broke the USB stack. When I reverted to an earlier version, the device worked fine. My clone of the repository is available on Github and its master branch now holds the still working version of the firmware.
Then I created a compact board to hold all the component. It has a single sided layout with only a few jumper wires on the top side and I used the toner transfer method for etching. The result did not turn out very pretty but it does the job. Unfortunately, in the first version of my design I missed R3 so the images on the gallery show a quick-fix for that problem. The board also features a 10 pin connector for the ISP since the firmware will probably still require more work. I added the revised EAGLE files to the repository.
Prologue
My soldering iron, my collection of spare electronic components and related tools had been stored away in the basement for years. Way back, I really enjoyed tinkering with those, but when I decided to go for the software engineering aspects of computer science I somewhat lost interest. So many things to try and so little time to spare. Also, I have been lacking the room to set up a suitable work space.

As with many other IT people of my age, my first “real” computer was a second-hand Commodore 64 that my parents bought for me in the mid-eighties. I absolutely loved that machine and spent countless hours in front of it, teaching myself it’s Basic and Assembler dialects. Even though I bricked the C64 a few years later, trying to install a self-designed relay card and replaced it with a C128, I could not bear parting from the Commodore hardware. So I stored the computer and it’s peripherals in card board boxes in the attic many years ago.
Spring 2009: By chance I stumbled across Ben Heckendorn’s blog where he describes how he created his Commodore 64 original hardware laptop. I really admired his work and I really wanted such a portable for myself! Ben integrated a 1541-III DTV into his construction to replace the traditional 1541 floppy disk drive, which of course would not have fit into the laptop. Using the 1541-III connected to the normal serial bus of the C64, it allows you to mount and read d64 disk images from ordinary MMC or SD memory cards. Awesome!
Googling around, I discovered that by now there are actually several different solutions that offer this feature. There are the afore mentioned “cousins” 1541-III DTV and 1541-DTV, both based on PIC micro-controllers. The design has later been ported by Lars Pontoppidan to an AVR micro-controller, which he called the MMC2IEC. The MMC2IEC hardware and firmware has been extended and improved by a bunch of other people and evolved into the SD2IEC. Finally, there is the 1541 Ultimate that reportedly does a good job of fully emulating the original 1541. As a result, it should be able to support even copy protected games and other software that comes with their own fast-loader routines. Unfortunately, the 1541 Ultimate is also rather expensive.
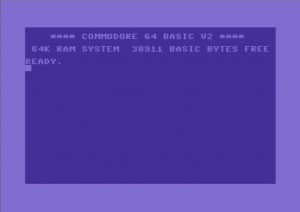
AntaBaka has done a great job of collecting and summarizing the evolution of the SD2IEC on his page, which is available in German only, though. It was when I read that page that I decided I wanted to build one of those SD2IEC myself. It would be a nice project to play around with the AVR micro-controllers that I kept reading about for some time on sites like Hack-a-Day and Makezine. And it would be a great excuse to dig out the old stuff I had hidden in basements and attics.
I also liked the idea of trying to save my old Basic and Assembler programs from oblivion, petty as they might be. My old discs had been been stored in the attic along with the hardware. They had to endure extreme heat in summer and cold temperature in winter for about 15 years. Would there be anything left to save? Or would even the disk drives be decayed and broken by now? To cut at least that long story short: my trusty old C128 was working fine when I pulled it from it’s card box. And the two 1541 were happily loading the randomly chosen disks I tried them with.
So, the first step would be to get the data from those discs and store it in d64 disk images on my PC’s hard drive. There are a bunch of different cables and adapters that can be used to accomplish this. The xu1541 appealed most to me because it is “legacy free” (what irony!), bridging between the USB port and the Commodore IEC serial port. Also, it is based on an AVR micro-controller.
But at first, I was a little afraid I could be wanting more than I could handle. So I decided to revive my tinkering in electronics with the simpler design of the xa1541 adapter which connects the 1541 disk drive to the parallel port of the PC. We’ll hear about that another day.

